The patron saint of bakers and pastry chefs is St. Honoré, the Bishop of Amiens somewhere in the late 5th century. One of the ways that his name lives on is the famous Gâteau St. Honoré. It was what all the beginning pastry students dreaded for their final exam (the cuisine equivalent involved butchering a rabbit and making fresh pasta….. you don’t want to know.)
But like many of complicated dishes on the culinary school curriculum there was a purpose behind it: the demonstration of multiple techniques within one dish. And one of the most important techniques in a St. Honoré is pâte à choux.
Every time I make pâte à choux, I wonder why I don’t do it more often. It’s a simple and incredibly versatile dough that’s made from the combination of flour, butter, water, and eggs but yet isn’t a staple of most home kitchens. Choux is a little different not because of what’s in it, but in the way it comes together - a partially cooked flour mixture that harnesses the power of steam to make it rise.
If you’ve ever eaten an éclair, a cream puff, a profiterole, a churro, or a funnel cake you’ve had pâte à choux . It has a savoury side in the form of gougères and gnocchi parisienne. It can be baked, fried, boiled, and I have an odd feeling you could probably do in the air fryer (let me know if you try it!) It’s also a ratio recipe, meaning you can scale it up or down without losing your marbles.
This is something you’re going to want to try.
The Gear:
Bowl
Wooden spoon or heat-proof spatula
Medium-sized pot
Scale or measuring cups/spoons
Baking sheet
Parchment paper or silicone baking mat
Pastry bag or tablespoon
Paring knife
The Ingredients:
Butter
Water
All purpose flour
Large eggs
Salt
The ratio for pate a choux is 2 parts water: 1 part butter: 1 part flour: 2 parts eggs, plus some salt. For my recipe I’m using 2 cups of water: 113 grams/1 stick of butter: 150 grams/1 scant cup flour: 4 large eggs. If you’re using salted butter you add just an extra pinch, if not try 1/4 teaspoon. If you want a sweeter vibe for your choux cut the salt to 1/8 of a teaspoon and add a tablespoon of white sugar. If you’re aiming for savoury feel free to crack in a little black pepper (I did!)
The Technique:
Add your water, butter, and salt to your pot and bring to a boil. If you’re using sugar add it here too.
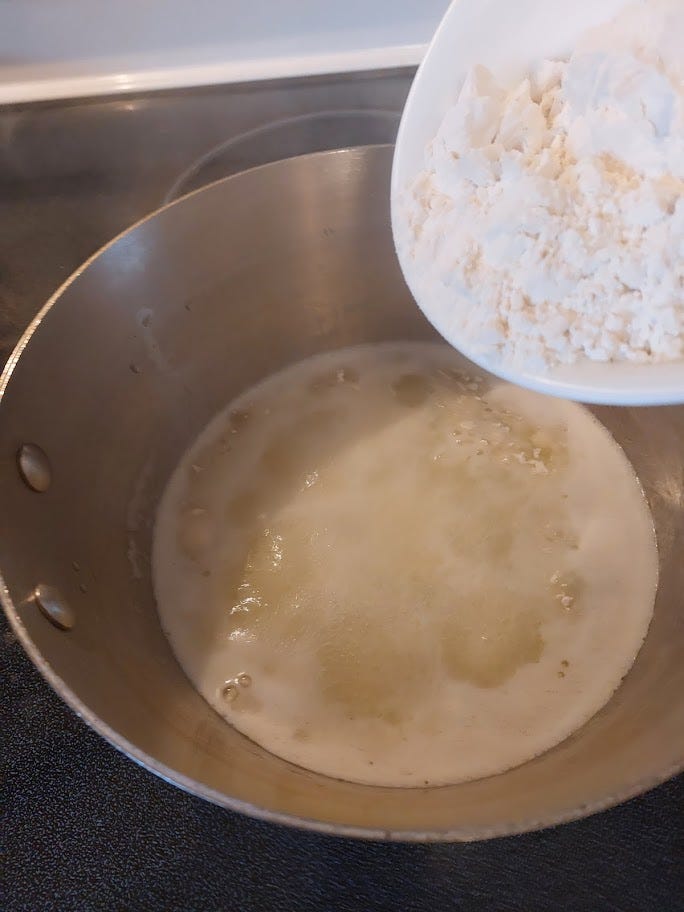
When your water/butter mixture is boiling, add the flour all at once and stir like mad.
When your dough comes together in a ball it’s done (it will happen fast!) The bottom of the pan should look clean. Remove from the heat. This one is almost there.
Add your eggs one at a time, stirring until each one is combined. It will seem like the eggs are refusing to mix, but persevere – this will work! You can also put your dough ball in a stand mixer and beat the eggs in (still one at a time) with a paddle attachment.
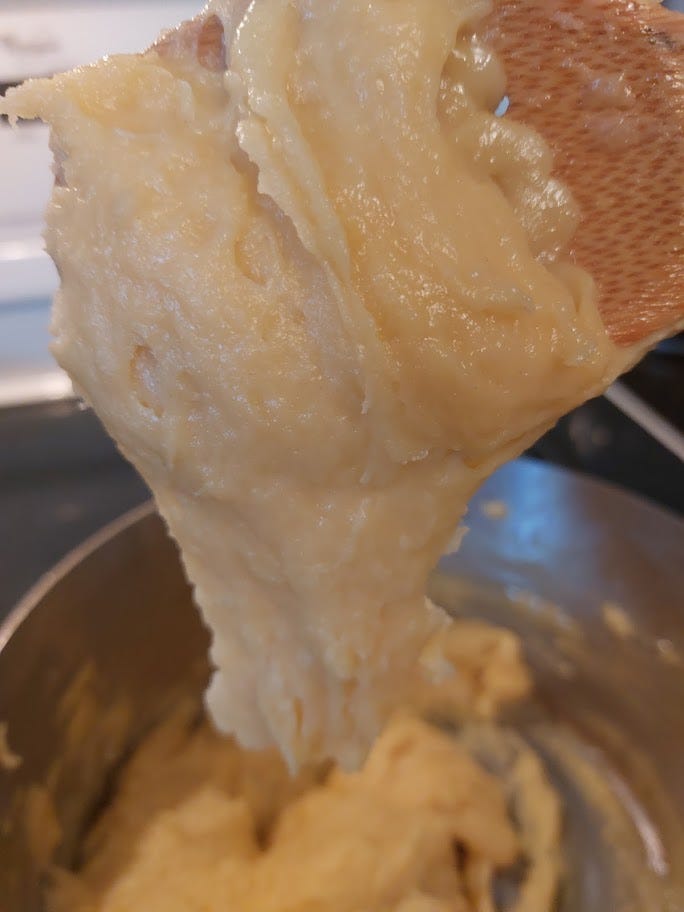
When you lift your spoon or spatula your dough should make a “V” shape. No “V”? Add one more egg.
Pour your dough into a piping bag (I strongly recommend the disposable kind available at your favourite online retailer or baking supply store). The easiest way is to prop the bag inside a tall glass or container. If you need a primer on piping bag technique check this out. My piping technique is neither tidy nor elegant. Don’t worry about a piping tip unless you want to get super-fancy - just snip off the end.
Pipe or spoon your dough into the desired shape on a parchment or silicone-lined baking tray. Smooth out the little peaks (or “hats”) with a wet finger.
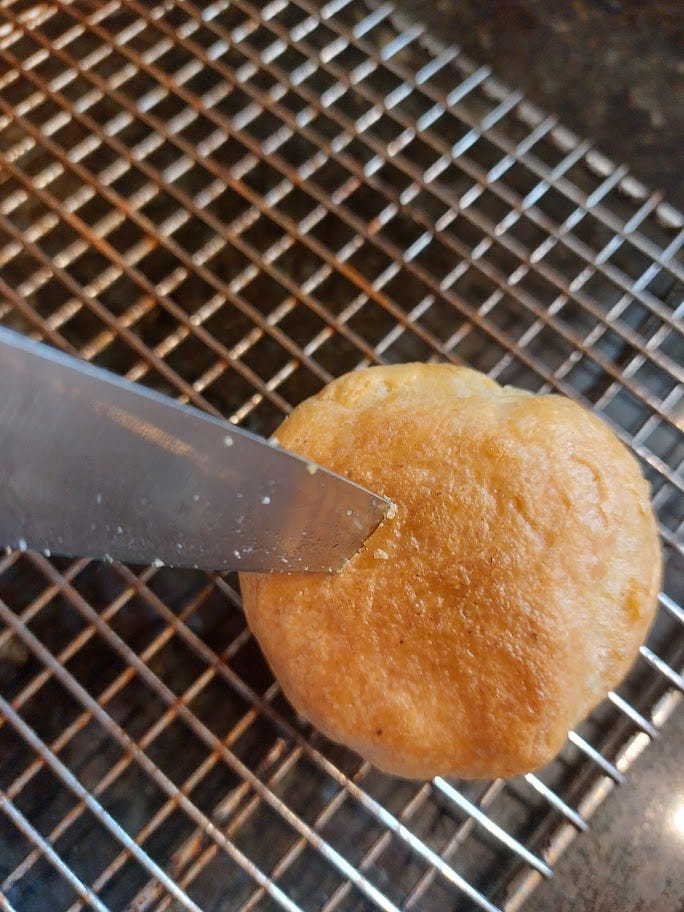
Bake at 425F for 10 minutes, then reduce heat to 350F and bake for an additional 10-20 minutes. I realize that’s not very specific, but the time will vary a lot by the size and shape of your choux. The best way to check is to tear into one to see if they are fully baked. This one is still wet, so not quite done!
Your choux are finished when they are evenly golden and sound hollow when tapped on the bottom. So long as the bottoms aren’t burning you can add another minute or two if you aren’t sure.
Flip your choux and poke a hole in the bottom with a paring knife. This will allow any steam to escape. You can put them back on the tray in the cooling oven (with the door propped open) to dry them even further.
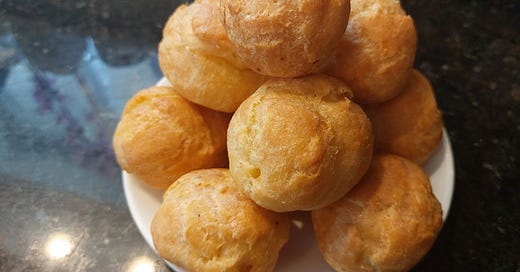
And what to do with a pile of choux? Sweetened choux can be filled with vanilla whipped cream (via those holes you poked) and dusted with powdered sugar or drizzled with chocolate. Savoury choux can be filled with spreads and dips as varied as your imagination. Or add half a cup or so of grated cheese to your dough after you’ve beaten in your eggs. Or sprinkle your choux with sesame seeds or other crunchy stuff before baking. Split them and stuff with ice cream. Add herbs to the dough. Let your imagination go crazy. Just remember to fill them as close to eating time as possible - no one likes a wet choux.
Your first choux probably may not be pretty but they will definitely impress. Fancy pastry is something that most home cooks leave to the neighbourhood bakery, but once you understand the steps and technique you’ll be looking for excuses to make them all the time. No matter sweet or savoury, whatever you have in mind you’ll have a choux that fits.


Wow. This is an exciting recipe. I think in isolation I could be intimidated by this concept. However, you made the recipe very accessible.