It’s been a long winter, but at least where I live it finally seems that the knee-deep snow and the -30C mornings are behind us. Even the garden beds are turning from ice to mud, the first real sign that the ground is indeed thawing.
And while spring is said to turn a young man’s thoughts to those of love, my mind turns to something completely different: pie.
Problem is, in this part of the world, it’s still going to be some weeks before there’s anything growing outdoors. Rhubarb is usually first, then haskap berries followed by strawberries in the late part of June (sunshine willing). The 4B growing zone is a drag.
So pie cravings need not go unanswered, but expectations must be tempered. I can drag out whatever’s left from last year from the bottom of the freezer, or maybe raid my stash of store bought fruit, but it’s just not the same, ya know?
I still want pie, and my kiddo is always game for anything chocolate, so I’m making chocolate pie.
My grandmother made chocolate pie from time to time, and it was always a hit. Who can argue with flaky pastry, smooth sweet pudding, and soft whipped cream?
Now I am, I will freely admit, a crap pastry chef. My training in pastry was minimal, straying little from the basics of a soufflé or an apple Charlotte. My style is rustic, not so much because I like it but because I don’t possess the mild neuroticism detail-oriented nature that it requires. I inevitably make a mess, have to cover things up with frostings and fillings, and I’m the proverbial bull-in-a-china shop with a pastry bag in my hand. So please indulge my messiness - I guarantee it will taste great, but I’ll leave the artistry up to you.
The various pastries (or pâtes) found in the French pastry repertoire are recettes de base, or basic recipes. How they are flavoured, shaped, filled and baked can vary, but the basic recipes for pâte sablée, pâte feuilletée and others are just that: basic. More than a recipe they are a ratio and a technique which is what makes them so versatile.
If you ask most people (or most North American, at least) about pie crust, they usually think of something flaky. The pastry they are thinking of is pâte brisée.
Pâte brisée, like the others, is tremendously versatile. It can be make sweet or savory and can be fussed with and shaped into anything you want. Today I’m going to make two pie crusts, which is enough for one double-crust pie, or two singles.
Here’s what you’ll need:
A pie plate (glass preferred), a box grater, a rolling pin, a pastry scraper or stiff spatula, frozen butter, all purpose flour, a pinch of salt, and some ice water. A scale would be great, but measuring cups will do.
Pâte brisée has a really simple ratio: 3 parts flour, 2 parts fat, 1 part water.
Remember a few weeks back when we played with gluten? In making seitan we washed the starch out of flour, leaving long strands of gluten protein behind. Here we want to coat the flour particles with fat to keep them from forming long strands. More gluten development = tough pie crust.
But making pâte brisée is a balancing act: you need it to come together as a dough, but you don’t want to handle it too much which could develop the gluten and risk melting the fat with your warm little hands.
Measure out 300 grams (about 2 cups) of flour, 200 grams of frozen butter (a bit less than a cup), and 100 grams (about 100 ml) of ice water. Add a good three-finger pinch of fine salt to your flour.
Chill all your ingredients and tools (including the flour).
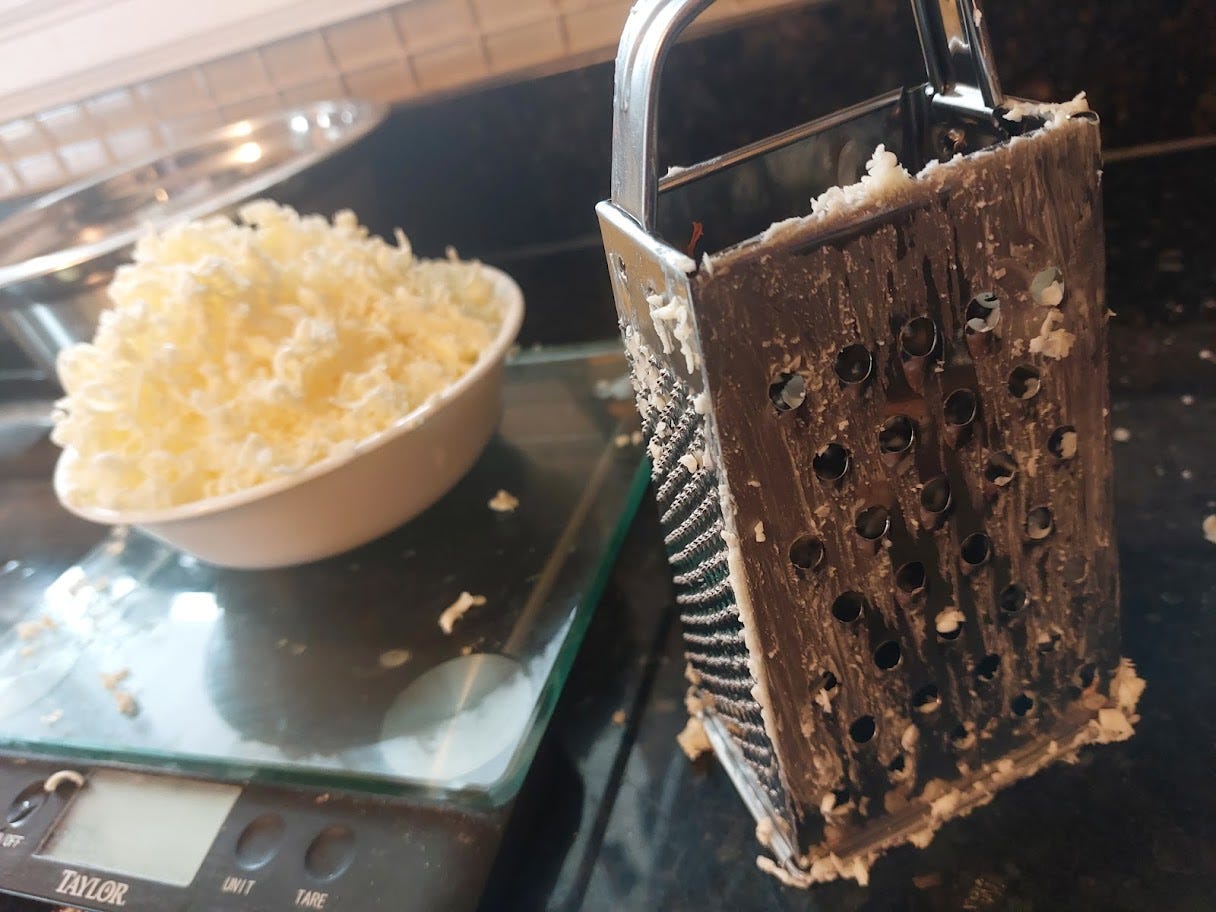
Grate your frozen butter on the large holes of the box grater. The colder the grater the less messy the process will be.
Make a mound of flour on your counter and make a circle in the middle for your butter.
Slowly “chop” the butter into your flour with your pastry scraper.
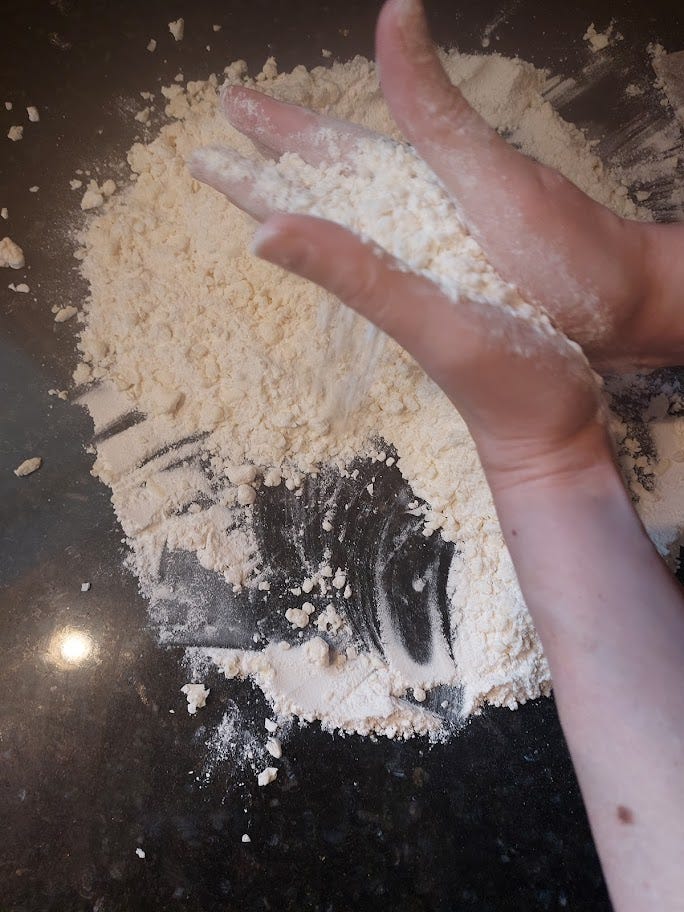
When the butter is worked in, rub the butter and flour together between your hands until you have a sand-like texture. Pea-sized lumps are okay!
Slowly add your ice water to your dough while working it in with your pastry scraper. You may need a little more, or a little less, so just a little at a time!
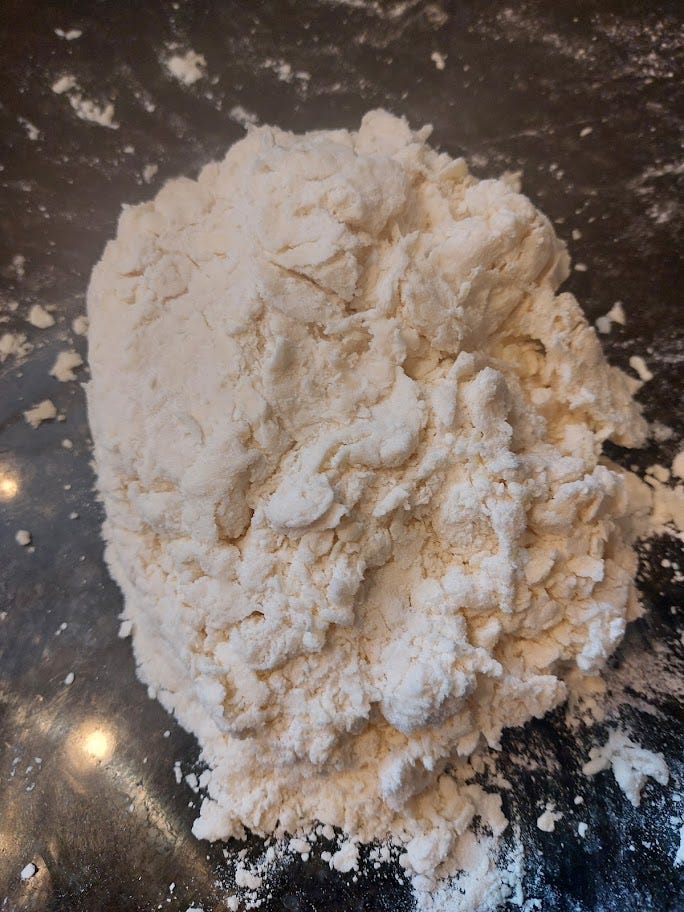
Push the dough together into a big heap.
Now, this is where I think a lot of recipes go wrong. Most recipes tell you to work the dough into a ball. But that violates all the admonitions about working the dough too much. If only there were a better way…..and thankfully, there is!
Take a piece of the dough and smudge it across the counter with the heel of your hand. The French term for this technique is called fraisage.
Scoop it up with a scraper and do it again with another bit.
In a few minutes you’ll have a pile of smooth dough bits that make an easy ball. Divide the dough into two pieces and pat them into thick disks. Wrap each in plastic wrap and refrigerate for at least 30 minutes.
After 30 minutes (or more), roll out your dough to a thickness of about two pennies. It should extend several inches beyond the size of your pie plate. Roll it up around your rolling pin and unroll it over your pie plate. Gently press it in to the corners and trim the edges. Chill for another 30 minutes.
My pie filling cooks on the stove top, so I need a fully-cooked (blind baked) pastry. But to avoid the dough bubbling and expanding as the water in the butter turns to steam during the baking process, I need to dock the dough (puncture small holes in the surface) with a fork, and use pie weights.
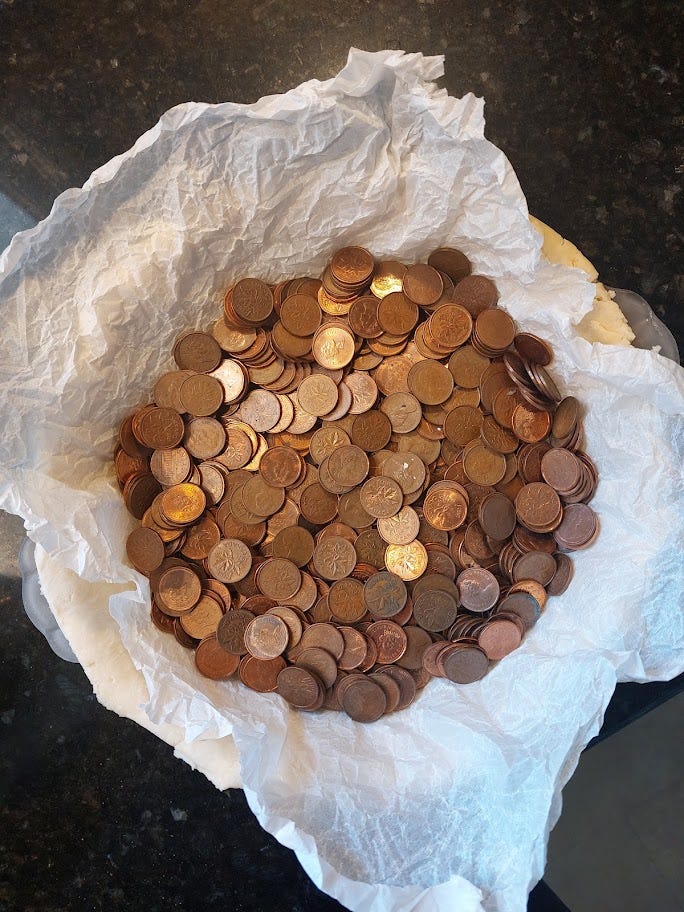
There are all sorts of opinions about the best pie weights to use. Some use specially made beads available at kitchen stores, others swear by rice or dried beans. But you probably have the best pie weights sitting in an old jar: pennies! Pennies conduct heat better than almost anything else you might use, and so long as you keep them off your dough with a sheet of well-crumpled parchment paper you needn’t worry about contamination (though wash your hands after handling coins, eh?)
Bake your pastry at 375F for about 15-18 minutes with the coins, then carefully remove the parchment and coins (they are hot!) and bake another 15-20 minutes for a fully baked crust, and 7-10 minutes for a partially baked crust.
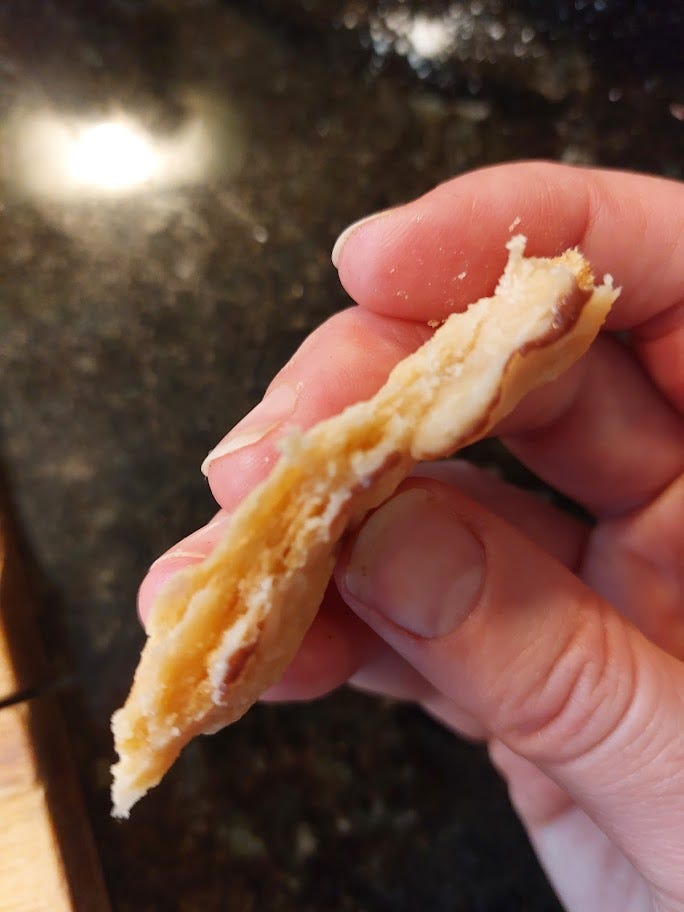
How does it look? Well, in my case, I missed a couple of corners when docking and got a few bubbles, and my shoddy trimming caused some of the edge to shrink back. I told you I was messy.
But that texture though. It’s shattering. It’s flaky and tender at the same time. It’s all the things you want in a pastry shell.
The best part though is that this ratio and technique is only the beginning. Want a little sweetness in your crust? Add a tablespoon or two of sugar. Add a touch of vanilla or a bit of cinnamon if you’d like. Making something savoury? Add some dried herbs like thyme or parsley both for colour and flavour. Skip the water and use wine!
And yes, you can use another type of fat if you really prefer. Many people use shortening (named for its ability to “shorten” gluten strands) because it is apparently easier to handle. That may be true, but that’s because the melting point of shortening is higher and it contains less water. But the taste just can’t compare to butter. Lard can be a good choice (my Grandma often used lard), but the lard in your local grocery store has little character and is processed to be almost flavourless. If you can get your hands on some leaf lard that’s a whole other story, but it’s hard to find. Butter wins in almost every category, and if you use good technique isn’t not difficult at all.
You’ve got endless options when it comes to pastry, but the 3-2-1 ratio will serve you well every time. It’s the dough you can use when you get a pile of fruit from a neighbour, when you’ve gone berry-picking, or when you need an impressive-looking quiche for a Sunday brunch. Once you have that ratio in your head you can bake without a recipe and your creativity can really shine.
And the best part? You’ll have pie.







I can almost taste that crust!